Install InfluxDB with helm
GitHub - influxdata/helm-charts: Official Helm Chart Repository for InfluxData Applications 가 helm chart를 이용한 설치법을 제공하는 공식 페이지.
helm repo add influxdata https://helm.influxdata.com/
$ helm repo list
WARNING: Kubernetes configuration file is group-readable. This is insecure. Location: /home/cychong/.kube/config
WARNING: Kubernetes configuration file is world-readable. This is insecure. Location: /home/cychong/.kube/config
NAME        	URL
myhelmrepo  	https://cychong47.github.io/helm-chart/
infracloudio	https://infracloudio.github.io/charts
influxdata  	https://helm.influxdata.com/
$ helm search repo influxdata
NAME                          	CHART VERSION	APP VERSION	DESCRIPTION
influxdata/chronograf         	1.1.17       	1.8.0      	Open-source web application written in Go and R...
influxdata/influxdb           	4.8.5        	1.8.0      	Scalable datastore for metrics, events, and rea...
influxdata/influxdb-enterprise	0.1.10       	1.8.0      	Run InfluxDB Enterprise on Kubernetes
influxdata/influxdb2          	1.0.7        	2.0.0-beta 	A Helm chart for InfluxDB v2
influxdata/kapacitor          	1.3.1        	1.5.4      	InfluxDB's native data processing engine. It ca...
influxdata/telegraf           	1.7.25       	1.14       	Telegraf is an agent written in Go for collecti...
influxdata/telegraf-ds        	1.0.16       	1.14       	Telegraf is an agent written in Go for collecti...
influxdata/telegraf-operator  	1.1.3        	v1.1.0     	A Helm chart for Kubernetes to deploy telegraf-...
$ helm upgrade --install -f influxdb-value.yaml influxdb influxdata/influxdb
Release "influxdb" does not exist. Installing it now.
NAME: influxdb
LAST DEPLOYED: Sat Oct  3 10:22:32 2020
NAMESPACE: default
STATUS: deployed
REVISION: 1
TEST SUITE: None
NOTES:
InfluxDB can be accessed via port 8086 on the following DNS name from within your cluster:

  http://influxdb.default:8086

You can connect to the remote instance with the influx CLI. To forward the API port to localhost:8086, run the following:

  kubectl port-forward --namespace default $(kubectl get pods --namespace default -l app=influxdb -o jsonpath='{ .items[0].metadata.name }') 8086:8086

You can also connect to the influx CLI from inside the container. To open a shell session in the InfluxDB pod, run the following:

  kubectl exec -i -t --namespace default $(kubectl get pods --namespace default -l app=influxdb -o jsonpath='{.items[0].metadata.name}') /bin/sh

To view the logs for the InfluxDB pod, run the following:

  kubectl logs -f --namespace default $(kubectl get pods --namespace default -l app=influxdb -o jsonpath='{ .items[0].metadata.name }')
$ kubectl get pods
NAME                             READY   STATUS    RESTARTS   AGE
influxdb-0                       1/1     Running   0          87s
podcast-nginx-659bcb6485-ps7qq   1/1     Running   0          86m
sosa0sa-nginx-87fc9949c-wb4jp    1/1     Running   0          95m

$ kubectl get svc
NAME            TYPE        CLUSTER-IP      EXTERNAL-IP     PORT(S)             AGE
influxdb        ClusterIP   10.110.66.138   <none>          8086/TCP,8088/TCP   92s
kubernetes      ClusterIP   10.96.0.1       <none>          443/TCP             390d
podcast-nginx   NodePort    10.108.15.141   192.168.1.100   8099:30912/TCP      86m
sosa0sa-nginx   NodePort    10.100.21.119   192.168.1.100   80:31806/TCP        95m
InfluxDB container에 접속해서 CLI확인
kubectl exec [POD] [COMMAND] is DEPRECATED and will be removed in a future version. Use kubectl kubectl exec [POD] -- [COMMAND] instead.
bash-4.4# influx
Connected to http://localhost:8086 version 1.8.0
InfluxDB shell version: 1.8.0
>  show databases
name: databases
name
----
_internal
$ helm install -f pocket-stat-value.yaml pocket-stat helm-chart/charts/pocket-stat/
NAME: pocket-stat
LAST DEPLOYED: Sun Oct  4 20:40:11 2020
NAMESPACE: default
STATUS: deployed
REVISION: 1
NOTES:
1. Get the application URL by running these commands:
  export NODE_PORT=$(kubectl get --namespace default -o jsonpath="{.spec.ports[0].nodePort}" services pocket-stat)
  export NODE_IP=$(kubectl get nodes --namespace default -o jsonpath="{.items[0].status.addresses[0].address}")
  echo http://$NODE_IP:$NODE_PORT
pocket-stat container를 이용해서 임시 데이터 입력
$ helm install -f pocket-stat-value.yaml pocket-stat ./helm-chart/charts/pocket-stat
NAME: pocket-stat
LAST DEPLOYED: Sun Oct  4 22:46:26 2020
NAMESPACE: default
STATUS: deployed
REVISION: 1
NOTES:
1. Get the application URL by running these commands:
  export NODE_PORT=$(kubectl get --namespace default -o jsonpath="{.spec.ports[0].nodePort}" services pocket-stat)
  export NODE_IP=$(kubectl get nodes --namespace default -o jsonpath="{.items[0].status.addresses[0].address}")
  echo http://$NODE_IP:$NODE_PORT

$ kubectl get pods
NAME                             READY   STATUS    RESTARTS   AGE
influxdb-0                       1/1     Running   0          36h
pocket-stat-5b86fbc8f7-xpf9j     1/1     Running   0          20s
podcast-nginx-659bcb6485-ps7qq   1/1     Running   0          37h
sosa0sa-nginx-87fc9949c-wb4jp    1/1     Running   0          37h
pocket-stat example app은 5초 주기로 임의의 데이터를 influxdb에 저장하는 동작 수행
이제 influxdb에 접속해서 database에 데이터가 입력되고 있는 지 확인
$ kubectl exec -it influxdb-0 /bin/bash
kubectl exec [POD] [COMMAND] is DEPRECATED and will be removed in a future version. Use kubectl kubectl exec [POD] -- [COMMAND] instead.
bash-4.4# influx
Connected to http://localhost:8086 version 1.8.0
InfluxDB shell version: 1.8.0
> show databases
name: databases
name
----
_internal
example
> use example
Using database example
> show field keys;
name: throughput
fieldKey fieldType
-------- ---------
dl_tp    integer
ul_tp    integer
> select * from throughput;
name: throughput
time                dl_tp host     region  ul_tp
----                ----- ----     ------  -----
1601819189000000000 192   server01 us-west 52
1601819194000000000 156   server01 us-west 53
1601819199000000000 189   server01 us-west 62
1601819204000000000 168   server01 us-west 55
1601819209000000000 191   server01 us-west 54
1601819214000000000 182   server01 us-west 51
1601819219000000000 181   server01 us-west 60
1601819224000000000 166   server01 us-west 58
1601819229000000000 198   server01 us-west 69
1601819234000000000 190   server01 us-west 55
Install Grafana with helm
GitHub - grafana/helm-charts 의 내용을 참고한다.
$ helm repo add grafana https://grafana.github.io/helm-charts
"grafana" has been added to your repositories

$ helm search repo grafana
NAME           	CHART VERSION	APP VERSION	DESCRIPTION
grafana/grafana	5.7.0        	7.2.0      	The leading tool for querying and visualizing t...
ClusterIP를
service:
        # type: ClusterIP
        # port: 80
        # targetPort: 3000
        #   # targetPort: 4181 To be used with a proxy extraContainer
  type: NodePort
  targetPort: 3000              # container app. itself
  port: 3000                    # pod
  nodePort: 3000                # cluster-wise
  externalTrafficPolicy: Local
  externalIPs: [192.168.1.100]
  annotations: {}
  labels: {}
  portName: service
$ helm install -f grafana-value.yaml grafana grafana/grafana
Error: Service "grafana" is invalid: spec.ports[0].nodePort: Invalid value: 3000: provided port is not in the valid range. The range of valid ports is 30000-32767
흠.. 다른 경우에 이렇게 사용했는데 뭔가 제대로 확인하는 것 같은 느낌.. 일단 다음과 같이 수정했다.
service:
        # type: ClusterIP
        # port: 80
        # targetPort: 3000
        #   # targetPort: 4181 To be used with a proxy extraContainer
  type: NodePort
  targetPort: 3000              # container app. itself
  port: 80                      # pod
  nodePort: 30000               # cluster-wise
  externalTrafficPolicy: Local
  externalIPs: [192.168.1.100]
  annotations: {}
  labels: {}
  portName: service
$ helm install -f grafana-value.yaml grafana grafana/grafana
NAME: grafana
LAST DEPLOYED: Sun Oct  4 23:01:12 2020
NAMESPACE: default
STATUS: deployed
REVISION: 1
NOTES:
1. Get your 'admin' user password by running:

   kubectl get secret --namespace default grafana -o jsonpath="{.data.admin-password}" | base64 --decode ; echo

2. The Grafana server can be accessed via port 80 on the following DNS name from within your cluster:

   grafana.default.svc.cluster.local

   Get the Grafana URL to visit by running these commands in the same shell:
export NODE_PORT=$(kubectl get --namespace default -o jsonpath="{.spec.ports[0].nodePort}" services grafana)
     export NODE_IP=$(kubectl get nodes --namespace default -o jsonpath="{.items[0].status.addresses[0].address}")
     echo http://$NODE_IP:$NODE_PORT


3. Login with the password from step 1 and the username: admin
#################################################################################
######   WARNING: Persistence is disabled!!! You will lose your data when   #####
######            the Grafana pod is terminated.                            #####
#################################################################################
$ kubectl get secret --namespace default grafana -o jsonpath="{.data.admin-password}" | base64 --decode ; echo
!@#!$!@!%!$
$ export NODE_PORT=$(kubectl get --namespace default -o jsonpath="{.spec.ports[0].nodePort}" services grafana)

$ echo $NODE_PORT
30000
이제 web을 통해 접속하면.
로그인 ID는 Grafana를 deploy했을 때 나온 안내에 있는 대로 admin 이고, 암호는 위의 명령을 통해 찾은 값을 사용해서 로그인한다.
로그인하면 이상한(?) 기본 데이터가 보이는데 뭔가 의미있는 정보겠지. 아마도 Grafana자체가 가지고 있는 어떤 metric이 아닌가 싶은데.
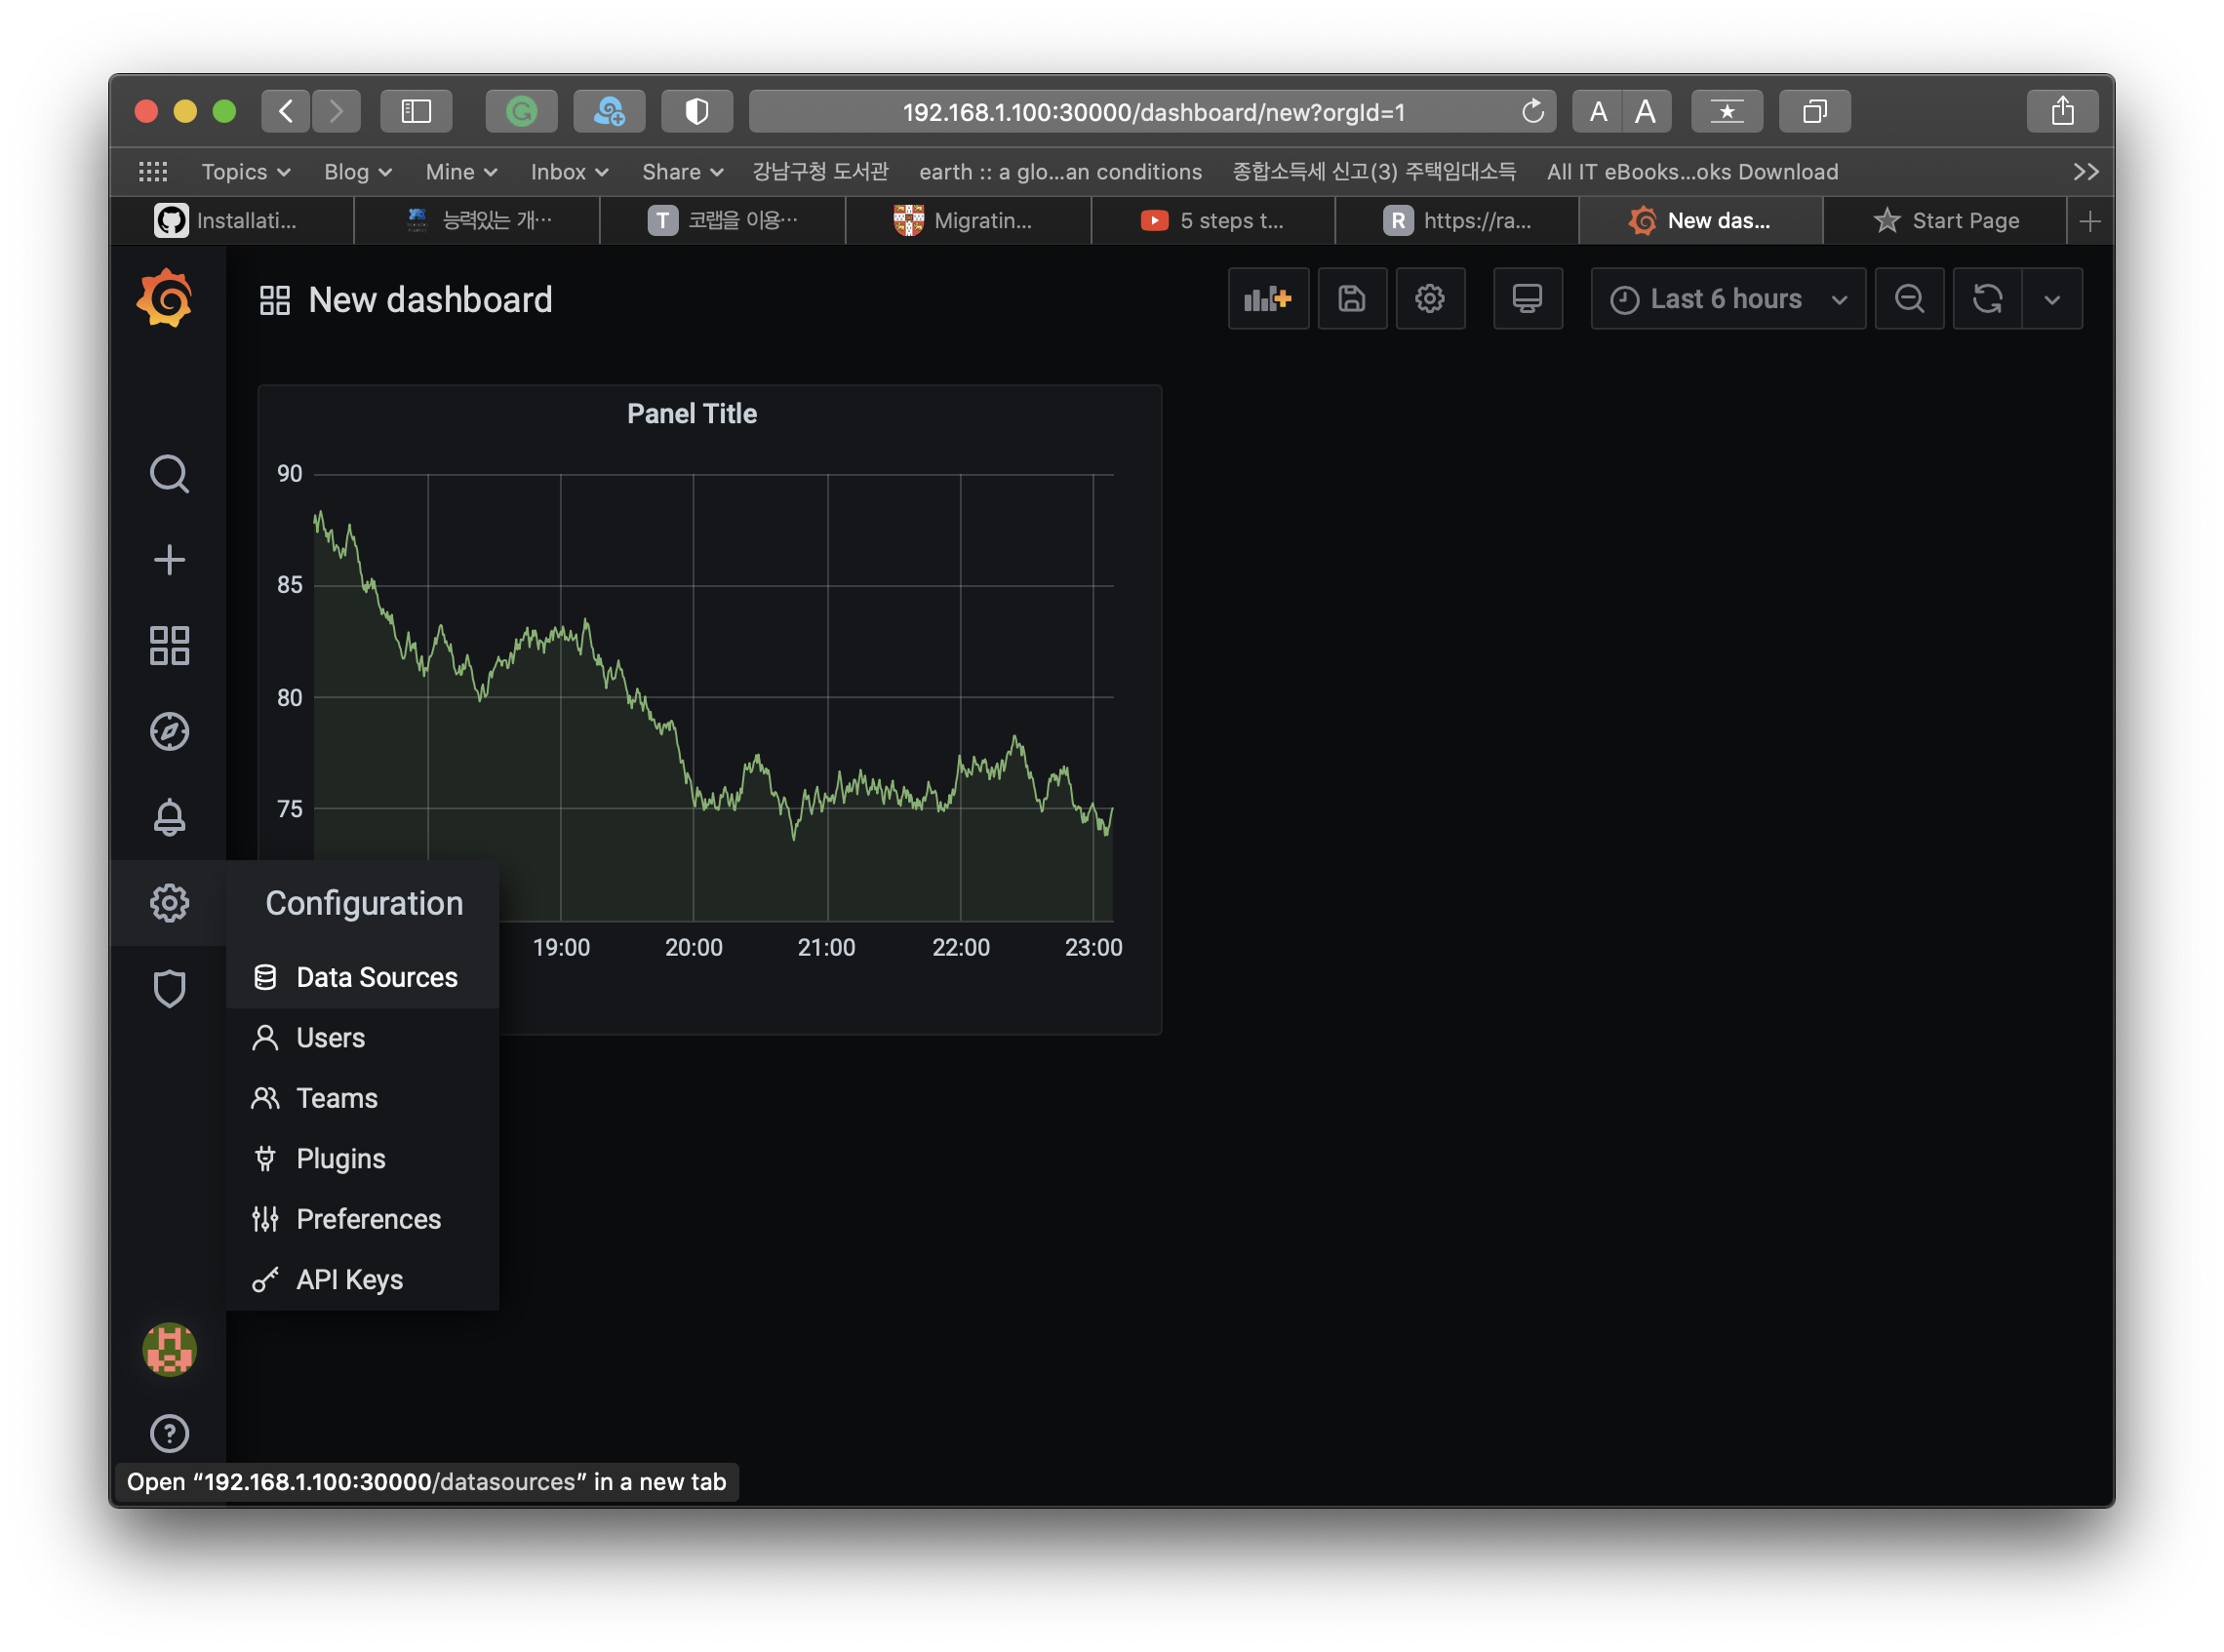
원하는 것은 influxdb에 저장된 데이터를 사용하는 것이므로, 아래 화면과 같이 “Data Sources”를 선택해서 Influxdb를 연결한다.
어렴풋이 예전에 했던 기억이 살짝 나려고 한다.
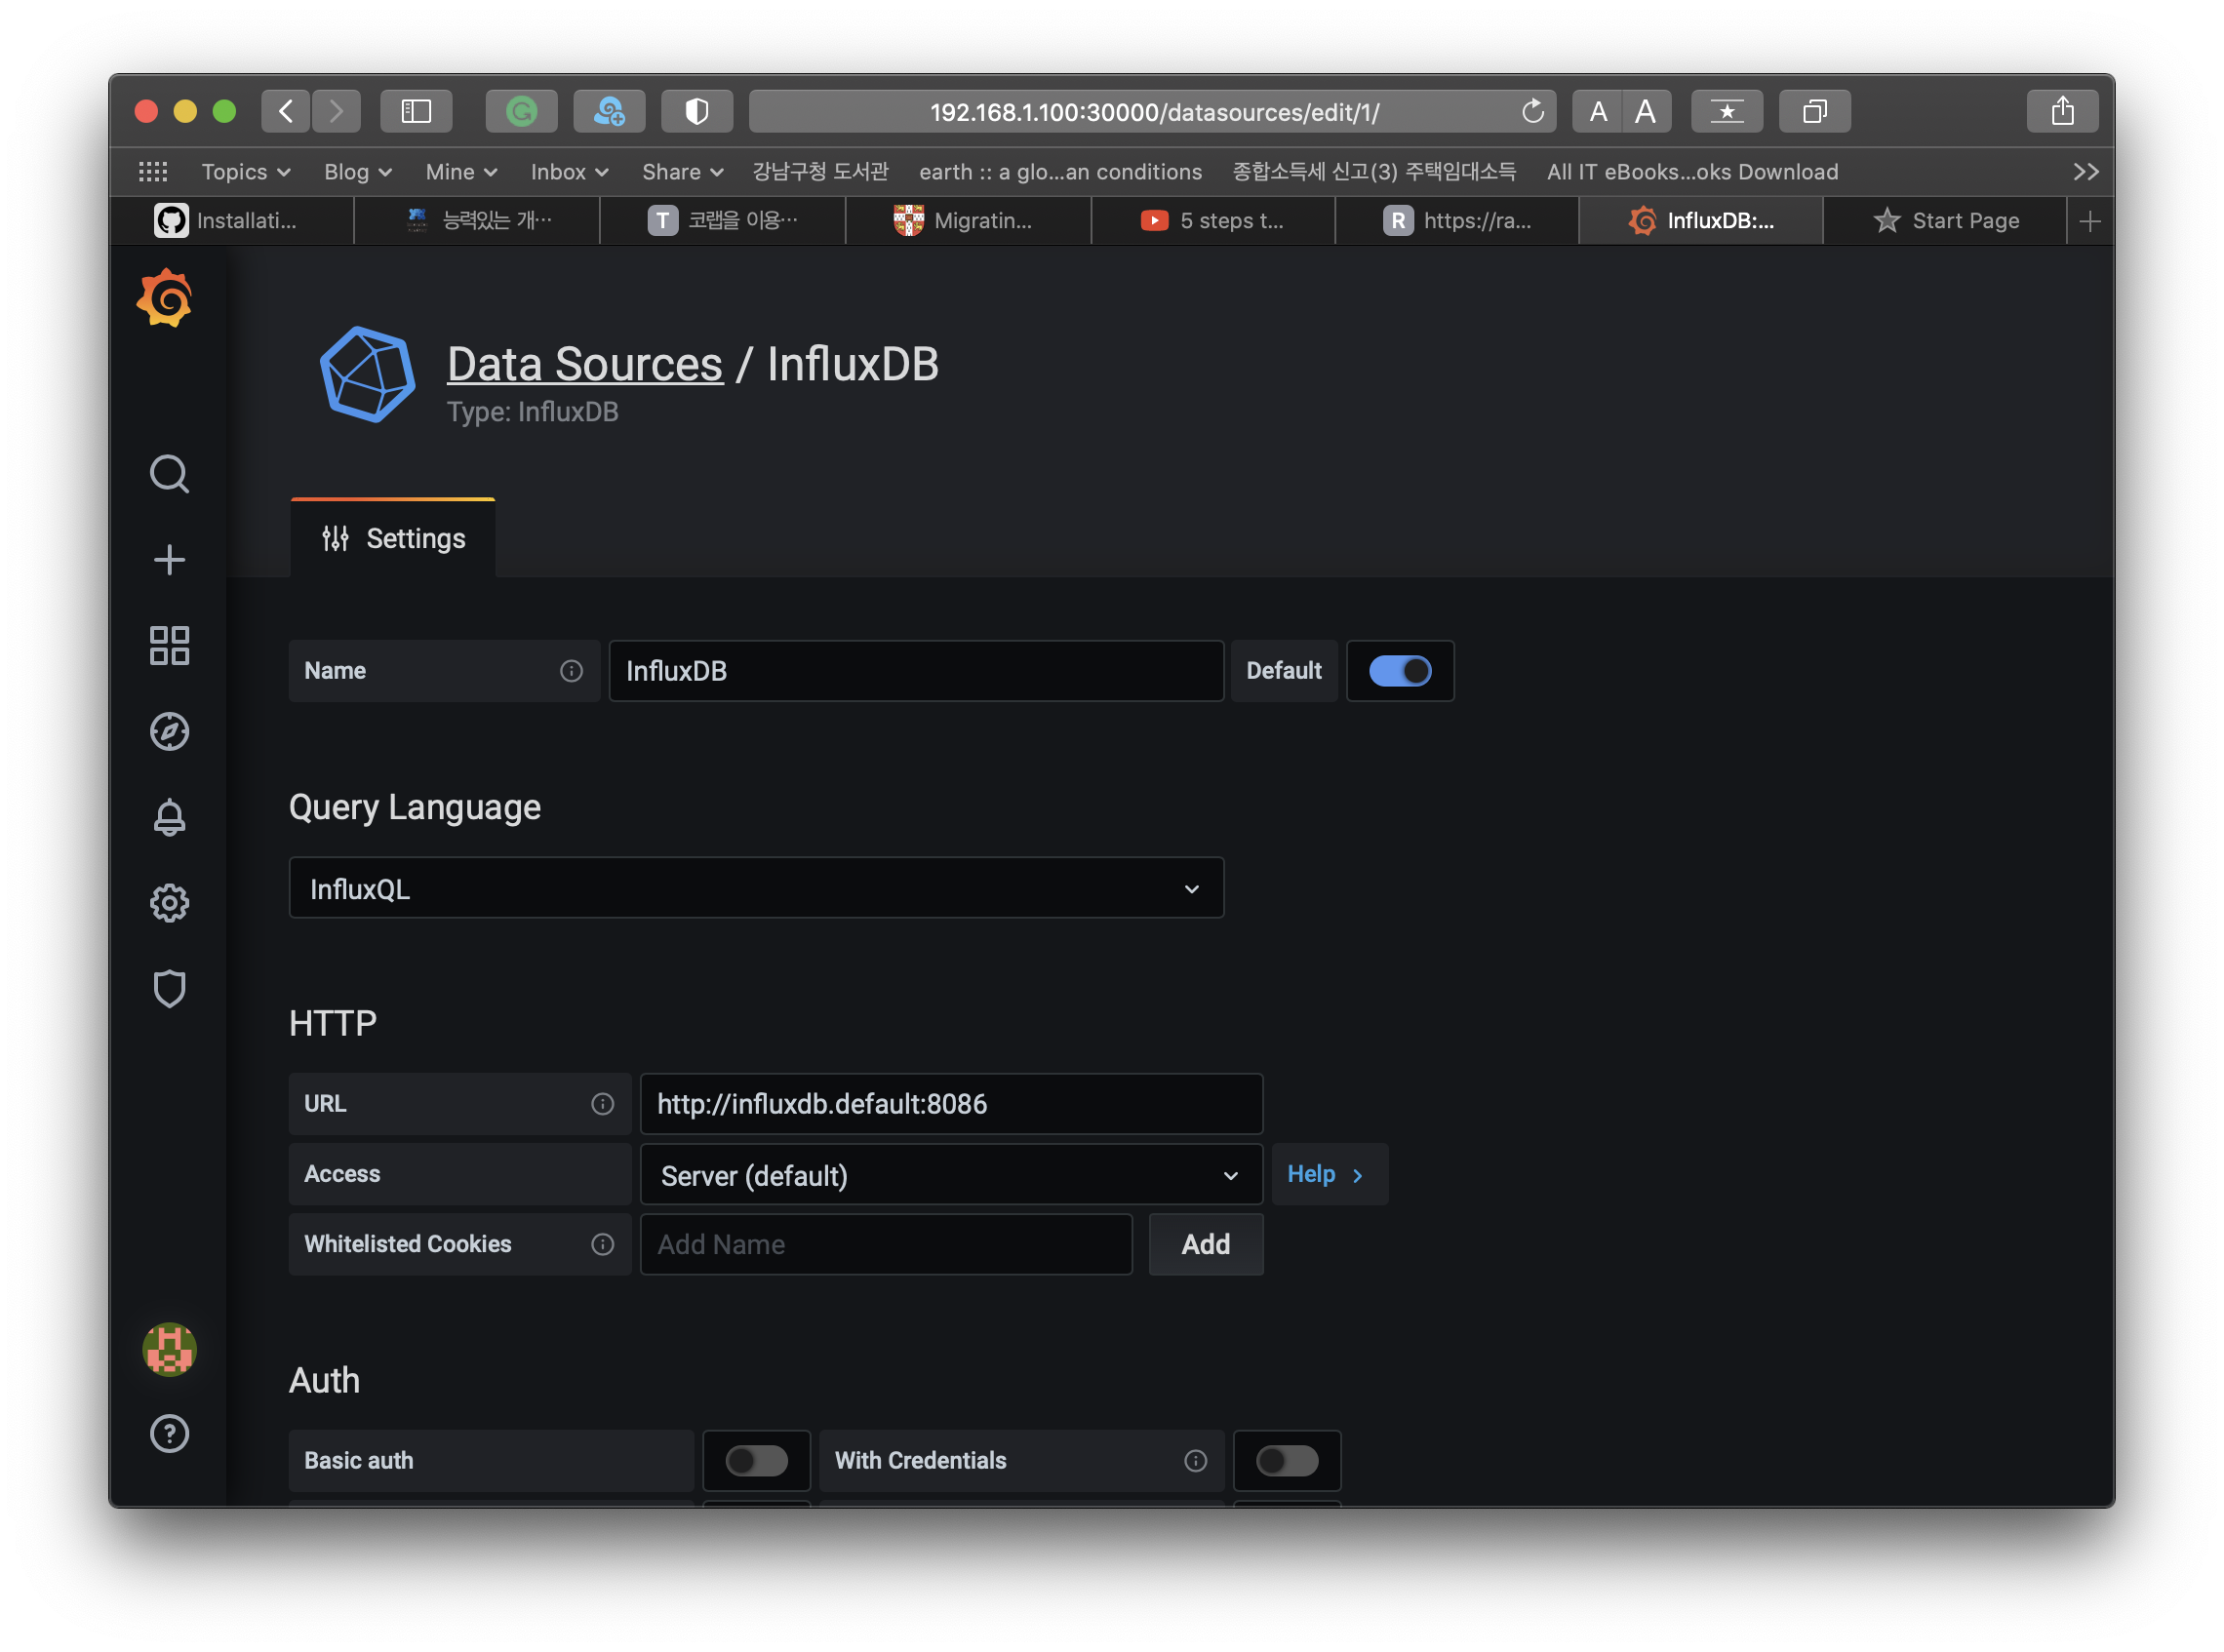
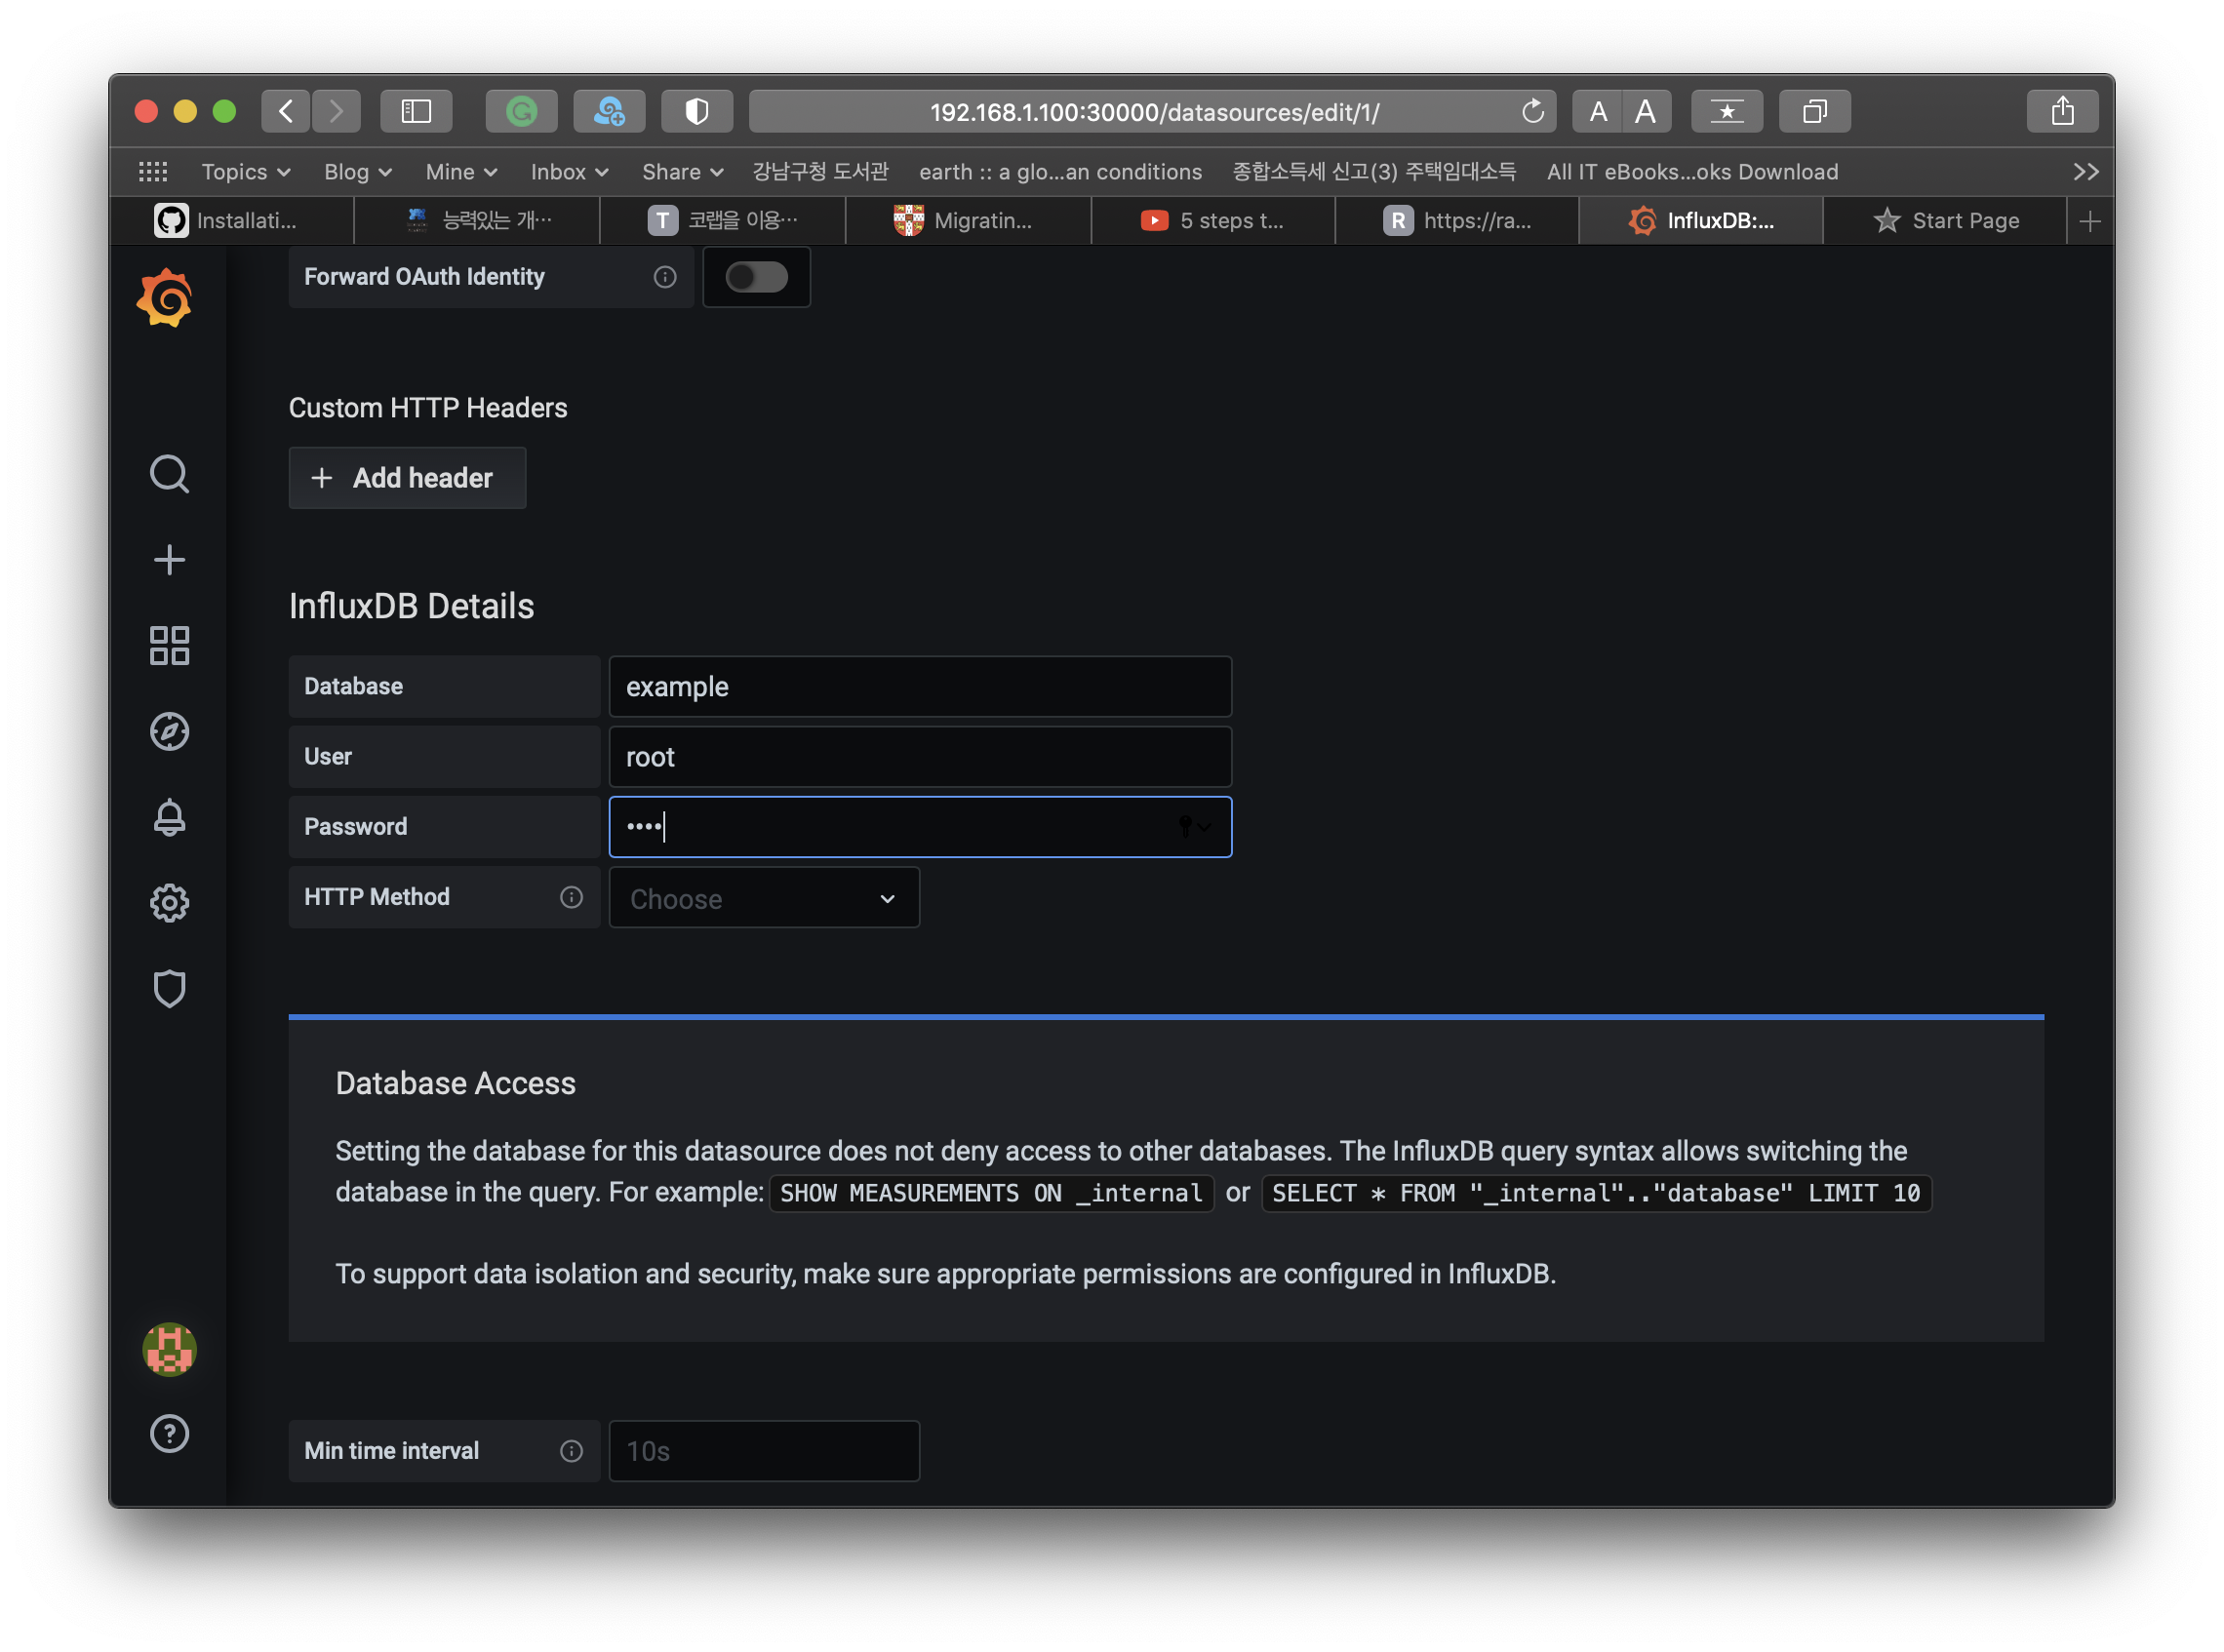
influxdb container에 대한 정보를 넣어주고 Save & Test를 누르니 한번에 OK가 뜬다. 이런 경우는 잘 없었는데 ….

역시 이전에 했던 기억을 되살려 데이터를 지정해 보는데
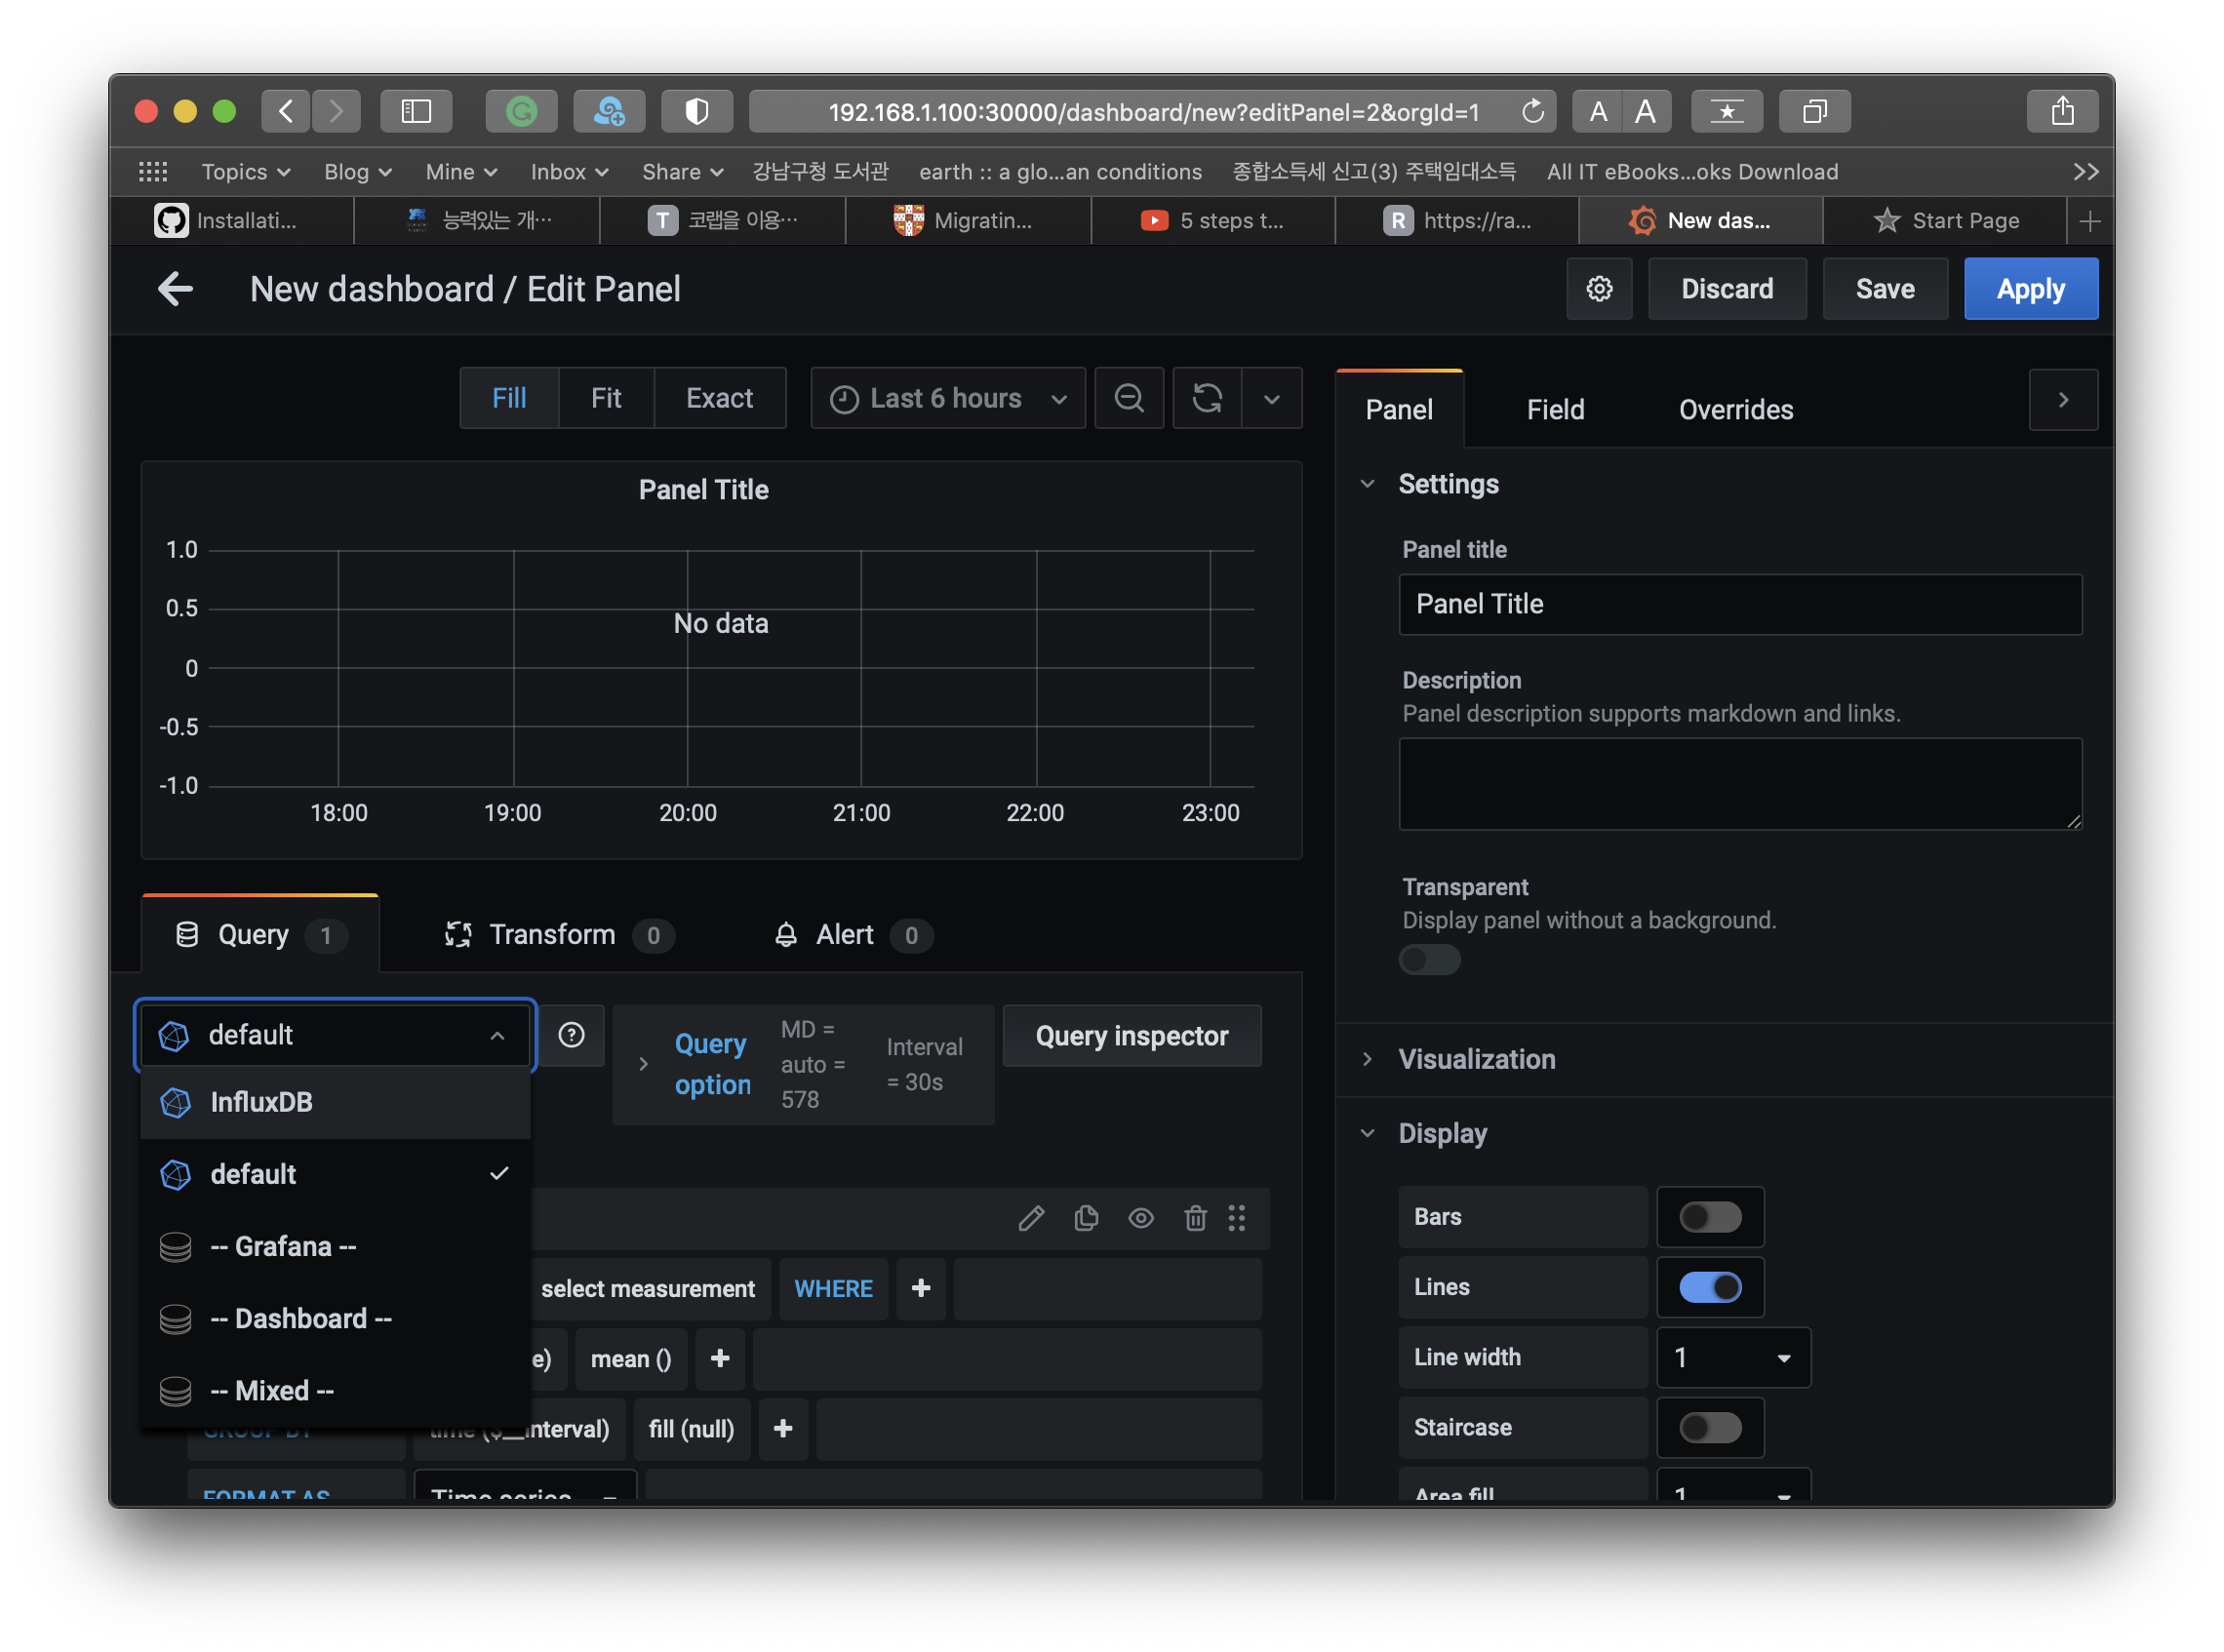
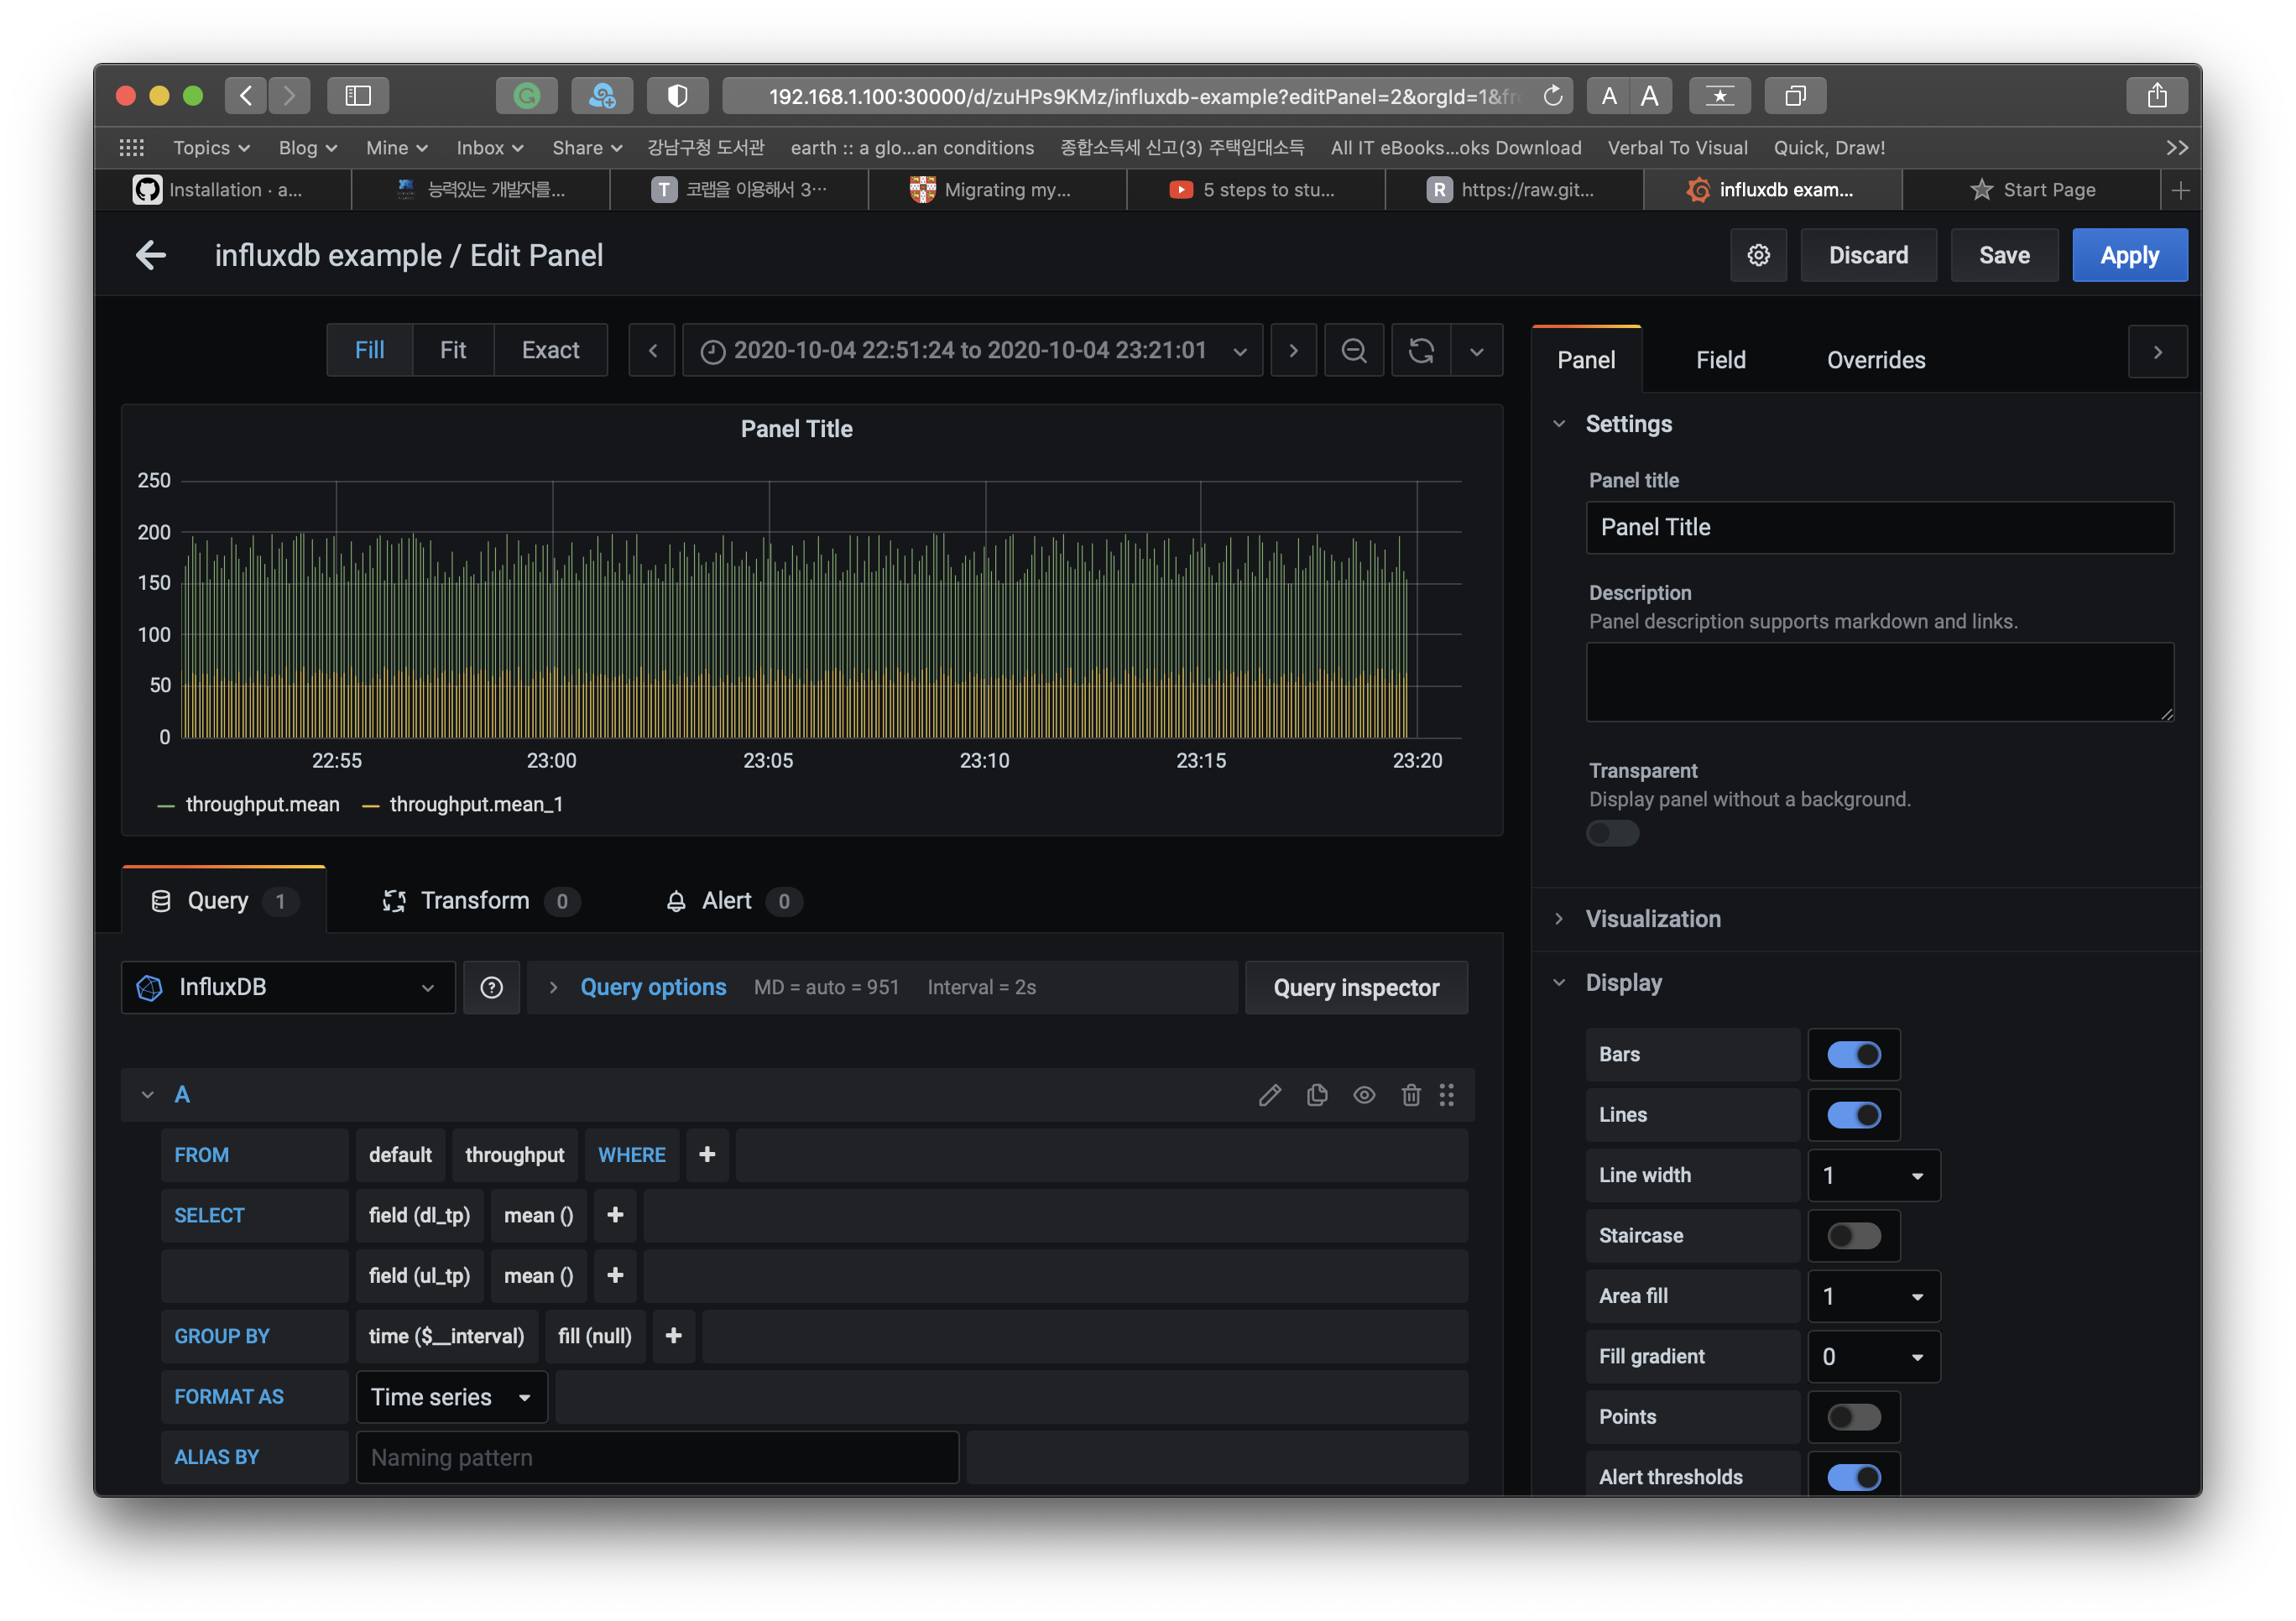
이제 3개 pod가 연동하는 걸 봤으니 test app은 삭제하고, 실제 의미있는 데이터를 넣어봐야겠다.
$ helm uninstall pocket-stat
release "pocket-stat" uninstalled
Reference
- GitHub - influxdata/helm-charts: Official Helm Chart Repository for InfluxData Applications influxdb를 helm으로 설치하기
- helm-charts/charts/influxdb at master · influxdata/helm-charts · GitHub
- Grafana, influxDB and python - Keep calm and write something
- GitHub - grafana/helm-charts Grafana를 helm으로 설치하기
#fun-for-life #helm #publish